Today I am sharing some great ideas for frameable prints on the Treasured Memories blog.
Showing posts with label home. Show all posts
Thursday, 26 February 2015
Wednesday, 11 June 2014
Spicing Up Our Kitchen
When we moved into our place I knew I wanted the colour changed, I love white walls so taupe just doesn't do it for me. We rent from the most wonderful woman / friend and she is so fabulous when it comes to creating a space we love. Want to paint? Go ahead. We're really so lucky & grateful. White walls and pops of colour, that's what I wanted. I went out, got paint and surprised Cory when he got home from work, "Hey Hun, we're painting tonight!" hahaha. The end result- I love it, it is so bright and cheery.
Before
Before
After
Adding pops of colour:
- table cloth is a piece of fabric that I found in the clearance section of the fabric store- $5 for a meter
- chalk art, my flowers and the alphabet for Anna
- fresh flowers
Adding pops of colour:
- a mason jar with teal paper straws that I found at Target for $1.99
- coloured kitchen tools that I already owned & a teal mason jar lid (2 for $5!)
- painted wooden spoons, 2 packages of spoons for $2 each and then paint I had (paint was on sale for $0.99). These spoons are for looks only.
- chalk sign I found at Michael's for $1.50
Adding pops of color:
- painted mason jars... I love a painted mason jar
- goblets I found at Target, 4 for $3.99
- blue mason jar and blue electric cover I found at an antique market . I paid $16 for the jar and $5 for the cover. These were my most expensive decorative purchases when adding color to the kitchen.
Friday, 28 February 2014
A peek into our bedroom.
Some of you might remember when I posted about my office/studio tour, about five months ago we moved my office back downstairs and our room back into the master. I confess I was a little sad but the decision was based on the lack of sleep we were all getting. Anna was having a tough time sleeping through the night and I though that if we were just down the hall from her room it may make a difference (it did for a while but then she went back to sleepless nights). I have grown to love my cozy room with the sun shining in and as for my office- it's a work in progress.
Here's a peek into my space...
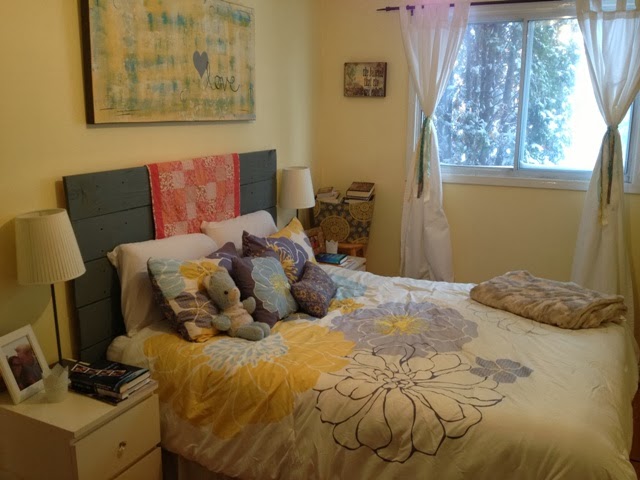
This is a DIY headboard (will talk about at the end) make from old boards Cory got from work.
Bedding set is from Home Sense.
Walking in.
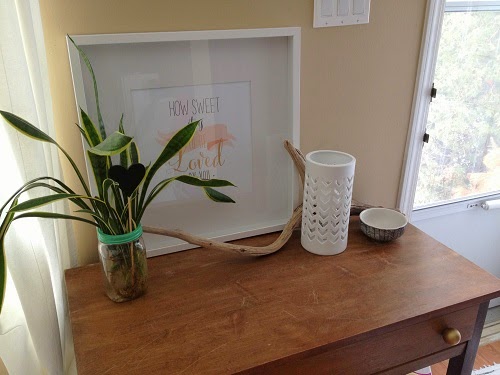
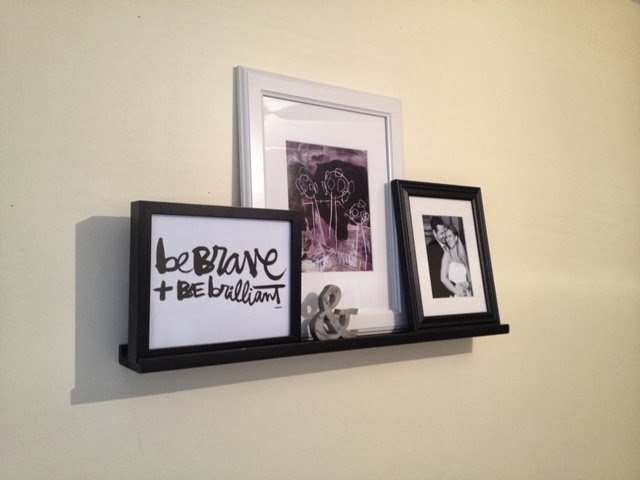
Three of my favourite prints/pictures.
A Kal Barteski print, Anna's drawing of our family and a wedding picture.
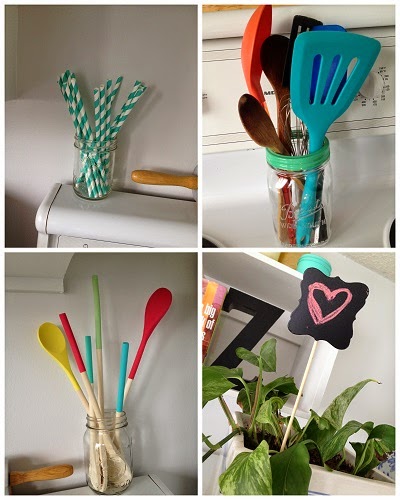
Top left clockwise: a thrifted serving tower turned jewelry holder, stems from Ikea,
jars turned candle holders, part of my heart rock collection.
Thrifted chair (love how chipped & peeled the paint is) turned stand, the first original art I have ever bought- an embroidered owl from Simply Stated Design. Every time I look at it it makes me so happy. Side note: I also think it would make a gorgeous tattoo!
Metal bust from Home Sense that I use for jewelry and the scarves I am currently wearing.
A close up of that fabulous owl!
Headboard DIY
I had always wanted a headboard and when Cory came home with a bunch of old boards from work to make a planter box I had a different plan. I didn't want the project to be complicated so I came up with the easiest method of creating a headboard I could think of. Cory put it together for me and I pretty much supervised the whole project. You know- the usual- he's good to me. The end result... I love how it turned out!
Supplies:
7 @ 1x8 boards
pewter screws
grey stain
a brush for staining
old cloths
drill, tape measure, level
- We measured how high we wanted the top horizontal board to sit (less one inch) above the bed, this was to determine how long the two vertical 1x8's needed to be. The less one inch comes into play because I didn't want to see the tops of the vertical 1x8's, with them an inch shorter you can't see the wood. We cut down the two vertical boards.
- We then measured how far past the bed we wanted the horizontal boards to sit. The horizontal boards were and didn't need to be cut.
- I then chose which order and which way I wanted the boards to face. I wanted the boards who had markings like knots to be facing and near the top. Cory then stained the boards.
- Cory then attached the horizontal boards to the verticals. Each horizontal board has 4 screws on each end going into the verticals. We used a level and measuring tape to get the most accurate spacing on those screws
- The headboard is attached to the wall just below the bottom board with screw and anchors.
Monday, 7 October 2013
Autumn Decor
I love to bring all the beautiful colours of fall into our home. The rusts, burgundies, browns & yellows... I love it! It always feels so warm & cozy.
kitchen mantel & table: leave garland, star, jars of coloured jewels, wooden tiles that spell grateful, candles, fall coloured table mat (actually a kitchen towel)
Living Room Shelf: leave garland, scattered jewels, a jar of jewels, a photo I was gifted of the most beautiful fall tree, a metal pumpkin, candles, decorative corn and since this photo was taken I have added in small, adorable pumpkins.
Wednesday, 24 October 2012
it's getting spooky up in here
I love Halloween, the decor, the kids in costumes (especially little ones) and of course... mini chocolate bars. I found a few new goodies to add to my decor this past weekend at my girlfriends garage sale. Jars and cake stands- I truly believe you could never have enough.
Take a peek into our spooktacular home.
*photo collages were created and edited with Picasa
Tuesday, 21 August 2012
a fabulous new table
I have been looking for a dining room table for quite some time now and was so excited when I came across this beauty. We went hunting at Value Village one Saturday, I walked back to the furniture section and immediately knew I had found it- it was the right size, had a leaf and was only $30! Whoot!
Fortunately for me I have the bestest husband ever and he loves all my DIY projects and he loves to work! He did all the painting- which I am terrible at and I did the sanding- I had the easy part but since he hates to sand we make a good team!
The Before.
During.
The After.
Ready to go.
It is so wonderful to have us all at the table and have room to eat!
LOVE!
Monday, 2 July 2012
a chalkboard wall
I have always wanted a wall painted with chalkboard paint!
So this weekend I was left to my own devices for a full day and when Cory came home from a fishing trip this is what he found. I love it! Anna loves it! I'm sure Cory loves it... well he loves it becasue I love it and that is really what matters isn't it? ;-)
I found the paint at Home Depot, you can see it here. One of my favorite things- you just wash off the chalk with a wet cloth. Easy Peasy!
Wednesday, 8 February 2012
valentine's decor
Our Valentine decor this year. I hung these hearts up while Anna was asleep and when she woke up and saw them it was all the recognition I needed. This girl appreciates that little something extra. She pointed, squealed and kept looking at me with a smile as if to say "Look Mama! Look at the hearts!" She is seriously the greatest!
Monday, 5 December 2011
Christmas Around Here
December first marks a little tradition Cory & I started a few years back, we call it-Christmas Decoration Celebration. We have a nice dinner, we dig out the tree and the decorations, pour a little egg nog and we set the tree up. Anna was right into it this year, digging in the boxes, playing with the lights, wondering what in the world was happening.
This past weekend we headed to Wellingtons for some live greenery & my amaryllis then to Home Sense for a couple fabulous little treasures and I finished up the rest of the house.
I love this time of year. I love the colors, I love the lights twinkling on the tree, I love the smell of pine, I love Chirstmas carols, I love buying presents for my family, I love holiday traditions, I love Christmas baking, I love reminiscing of years gone by. What do you love?
Sunday, 13 November 2011
a lady bug birthday
I have a one year old- wow! I really can't believe how fast this year has gone by. It had it's share of ups & downs but when I look back I am so grateful for the amazing blessings that she has brought into my life. We celebrated all weekend and had two little parties for her. The birthday girl is all partied out and momma & daddy are pretty tired themselves. I am so grateful for my family and for the friends that were able to come celebrate with us. She definitely loved all the attention and is over the moon happy with all her new goodies.
The days leading up to this weekend were busy busy for me, I made all the decorations and put special touches into everything. I love this sort of thing and with my current obsession with pinterest the ideas were piling up all around me. I wanted to share some of the pictures with you here. I'll be back tomorrow with pictures of the birthday girl.

The days leading up to this weekend were busy busy for me, I made all the decorations and put special touches into everything. I love this sort of thing and with my current obsession with pinterest the ideas were piling up all around me. I wanted to share some of the pictures with you here. I'll be back tomorrow with pictures of the birthday girl.
Tuesday, 18 October 2011
spooktacular
I love Halloween... LOVE. I got so many ideas for decorations from Pinterest this year, so great! I had so much fun putting this all together and every time I added something new I got giddy and may have cheered to myself a few times! I have been collecting these decorations for the last few years they have either been gifts or found at Home Sense and Michael's.
I made the pom poms, garland and bats- click on each for the link to where I found them and the how-to's.
This garland was made using elements from Janet Hopkins digital Happy Haunting Kit.
I made the pom poms, garland and bats- click on each for the link to where I found them and the how-to's.
I had the hard job of finishing some wine to make these potion bottles ;-) I found the potion labels here.
These paper pin wheel decorations are everywhere! Why? Because they're AWESOME! I found a tutorial for you from Amy Butler (who is also awesome), you can find it here.
Thanks for looking!
Subscribe to:
Posts (Atom)